Hunter Ceiling Fan Owners Manual: A Comprehensive Guide
This manual provides detailed instructions for installation, operation, maintenance, and troubleshooting of your Hunter ceiling fan, ensuring optimal performance and longevity.
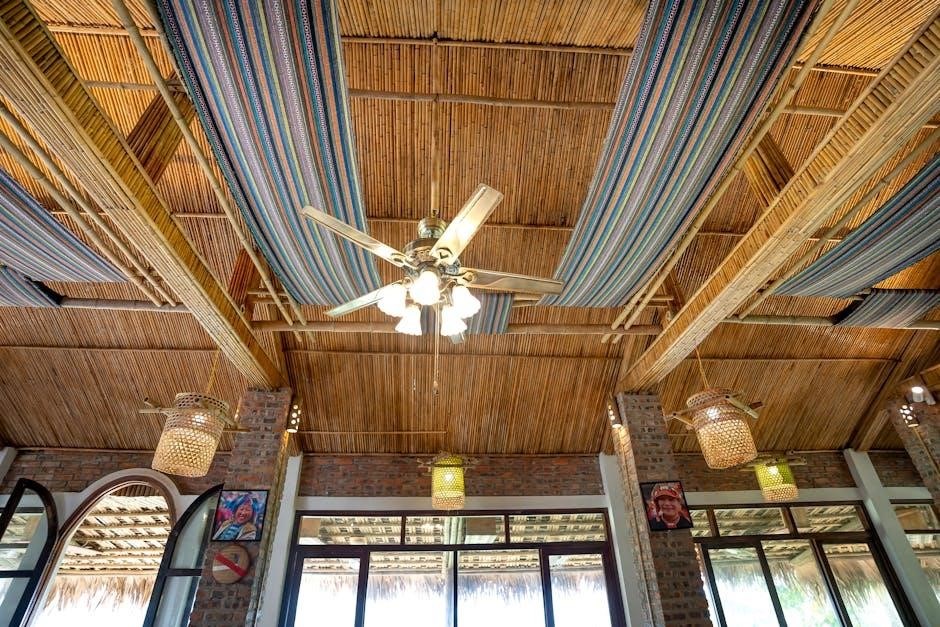
Understanding Your Hunter Ceiling Fan
Hunter ceiling fans are designed for both comfort and efficiency, offering a variety of styles and features to suit diverse needs. Before installation or operation, familiarize yourself with the fan’s components and functionalities. This section will guide you through identifying key parts, understanding the reversible motor, and recognizing the different control options available – pull chains or remote control. Knowing your fan’s specific features, like light kit compatibility, will enhance your experience. Proper understanding ensures safe and effective use, maximizing the benefits of your Hunter product.
Locating the Model Number
Finding your Hunter ceiling fan’s model number is crucial for accessing specific support, replacement parts, and detailed documentation. The model number is typically found in several locations. Check the original packaging, often printed on a label outside the box. Alternatively, inspect the fan itself; downrod-mounted fans usually have a sticker on the motor housing facing the ceiling; You can also use the UPC or SKU number for online searches. Having this number readily available streamlines troubleshooting and ensures you receive the correct assistance from Hunter’s customer support.
On the Fan Housing
Locating the model number directly on the fan housing is often the easiest method. For downrod-mounted Hunter ceiling fans, carefully examine the top of the motor housing – this is the portion facing the ceiling when installed. A sticker containing the model number should be affixed to this area. The placement can vary slightly depending on the specific fan design, so a thorough visual inspection is recommended. This sticker provides quick access to the necessary information for support or replacement parts, without needing the original packaging.
Inside the Original Packaging
The model number is frequently printed on the packaging of your new Hunter ceiling fan. Check the box itself, particularly the sides or bottom, for a label or directly printed text displaying the model identification; Often, this label will also include the UPC or SKU number, providing multiple identifiers for your fan. Retaining the original packaging, even after installation, is advisable, as it serves as a convenient reference point for locating this crucial information should you require assistance or replacement parts in the future.
Using the UPC or SKU Number
If you’ve misplaced the model number, the Universal Product Code (UPC) or Stock Keeping Unit (SKU) found on the original packaging can be invaluable. These numbers uniquely identify your specific fan model. Search online using either the UPC or SKU – omitting any spaces – to locate your fan’s details on the Hunter website or through retail partners. This method is particularly useful when contacting customer support or ordering replacement parts, as it provides an alternative means of identifying your fan for accurate assistance and compatibility.
Safety Precautions
Prioritizing safety is crucial during installation and operation. Always disconnect the electrical power supply at the breaker box before commencing any work on the fan. Ensure all wiring connections are secure and comply with local electrical codes. Regarding the blades, inspect them regularly for damage and tighten any loose screws to prevent accidental falls. Keep children and pets clear of the installation area and operating fan. Never attempt modifications or repairs beyond your expertise; consult a qualified electrician if needed, safeguarding against potential hazards.
Electrical Safety Guidelines
Before installation, completely shut off the electrical power at the circuit breaker or fuse box. Verify the power is off using a non-contact voltage tester. Ensure the electrical box is rated to support the fan’s weight and is securely mounted to the building structure. All wiring must adhere to local and national electrical codes. Never ground the fan to plumbing pipes. If you are unfamiliar with electrical work, consult a qualified and licensed electrician to prevent potential shock or fire hazards, ensuring a safe installation process.
Blade Safety Considerations
Always ensure the fan blades are securely attached to the blade holders and the motor housing. Before performing any maintenance or cleaning, turn off the power to the fan at the circuit breaker. Inspect blades regularly for cracks or damage; replace damaged blades immediately. Keep hands and objects clear of rotating blades at all times. Never attempt to stop the blades manually while they are in motion. Maintain sufficient clearance between the blades and surrounding objects, like furniture or curtains, to prevent accidental contact and ensure safe operation.
Installation Guide
Proper installation is crucial for safe and efficient fan operation. Begin by carefully preparing the installation site, ensuring adequate ceiling support and electrical wiring. The mounting bracket must be securely attached to a ceiling joist capable of supporting the fan’s weight. Follow the wiring diagram precisely, connecting the wires correctly to avoid electrical hazards. Double-check all connections before restoring power. Always consult a qualified electrician if you are unsure about any aspect of the installation process, prioritizing safety above all else.
Preparing for Installation
Before you begin, verify all components are present and undamaged. Turn off power to the circuit at the breaker box. Assess your ceiling structure to confirm it can support the fan’s weight – a reinforced mounting box is often necessary. Clear a workspace beneath the installation area, protecting flooring with a drop cloth. Gather necessary tools: screwdriver, wire strippers, electrical tape, and a ladder. Review the included wiring diagram to understand the connections. Ensure you have the correct replacement parts if upgrading an existing fixture.
Mounting the Fan
Securely attach the mounting bracket to the ceiling’s electrical box, ensuring it’s firmly supported. Carefully lift the fan motor assembly and hang it on the bracket’s hook (if provided) to free your hands. Connect the downrod, if applicable, tightening all screws and pins according to the instructions. Gently raise the fan into position, aligning the holes in the canopy with the bracket. Attach the canopy, concealing the wiring and mounting hardware. Double-check that all screws are tightened, and the fan is securely fastened to the ceiling before proceeding.
Wiring the Fan
Before wiring, ensure the power is completely OFF at the breaker. Identify the fan’s wires (typically black for hot, white for neutral, and green or bare copper for ground). Connect the fan’s wires to the corresponding house wires using wire connectors, ensuring a secure connection. If your fan includes a light kit, connect the light kit wires accordingly; Carefully tuck the wires into the electrical box, avoiding any pinching or strain. Secure the canopy to the mounting bracket, concealing the wiring. Double-check all connections before restoring power.
Operating Your Hunter Fan
Your Hunter fan offers versatile operation for year-round comfort. Pull chains typically control fan speed (low, medium, high) and the light kit. Gently pull the appropriate chain to cycle through the desired settings. If equipped with a remote control, use the buttons to adjust fan speed, turn the light on/off, and potentially reverse the motor direction. The reversible motor allows for airflow direction change – clockwise for winter warmth and counterclockwise for summer cooling. Familiarize yourself with all remote functions for optimal control and convenience.
Using the Pull Chains
Hunter ceiling fans with pull chains offer simple, direct control. One chain typically manages fan speed, cycling through low, medium, and high settings with each pull. The second chain controls the integrated light kit – a single pull usually turns the light on, and subsequent pulls cycle through dimming options if available. Ensure gentle pulls to avoid damaging the mechanism. Note that some models may combine functions on a single chain, requiring multiple pulls to access all features. Always observe the fan’s response to each pull.

Remote Control Operation
Hunter fan remote controls provide convenient, wireless operation. Begin by ensuring fresh batteries are installed. The remote typically features buttons for fan speed (high, medium, low), light control (on/off, dimming), and potentially a “reverse” function. Some remotes offer programmable features or compatibility with smart home systems. To pair a remote, consult the specific model’s instructions, often involving a receiver unit within the fan’s housing. Proper aiming at the fan is crucial for reliable signal transmission. Keep the remote dry and avoid extreme temperatures.
Troubleshooting Common Issues
Encountering problems with your Hunter ceiling fan is common, but often easily resolved. If the fan doesn’t turn on, check the power supply, wall switch, and remote batteries. Excessive wobbling usually indicates unbalanced blades; use the balancing kit included with your fan. A non-responsive remote may require battery replacement or re-pairing with the receiver. For humming noises, ensure all screws are tightened. If issues persist, consult the full manual or contact Hunter customer support for assistance, providing your model number for efficient troubleshooting.
Fan Doesn’t Turn On
If your Hunter fan fails to operate, begin by verifying the power source. Ensure the wall switch is in the “on” position and the circuit breaker hasn’t tripped. Check the remote control batteries, replacing them if necessary. Confirm the receiver unit within the fan housing is properly connected. For fans with a disconnect switch, ensure it’s engaged. If using a dimmer switch, confirm compatibility. If these steps don’t resolve the issue, consult a qualified electrician, providing your fan’s model number for accurate support.
Fan Wobbles Excessively
Excessive wobbling in your Hunter ceiling fan often indicates imbalance. First, verify all blade screws are securely tightened. Use a balancing kit (often included with the fan) to identify and correct blade weight discrepancies. Ensure the mounting bracket is firmly attached to the ceiling joist and is rated for the fan’s weight. Check that the downrod is the correct length for your ceiling height. If wobbling persists after these steps, slightly adjust the blade holders to optimize airflow and stability. Consult a professional if the issue remains unresolved.
Remote Control Not Working
If your Hunter fan’s remote isn’t functioning, begin by replacing the batteries with fresh ones, ensuring correct polarity. Verify the remote is paired with the receiver in the fan’s housing; consult the manual for re-pairing instructions. Check for obstructions between the remote and the fan receiver. Ensure the fan’s power switch is on. If the issue persists, try resetting the receiver by turning off power to the fan for several minutes, then restoring it. A faulty receiver may require replacement; contact Hunter support for assistance.
Maintenance and Care
Regular maintenance extends your Hunter fan’s lifespan and efficiency. Periodically clean the fan blades with a soft cloth and mild detergent to prevent dust buildup, which can affect airflow and balance. Inspect and tighten all screws and connections – including blade brackets, mounting hardware, and light kit attachments – at least twice a year. This prevents wobbling and ensures safe operation. Avoid using abrasive cleaners or solvents. Lubricate the motor occasionally as recommended in the full owner’s manual for smooth, quiet performance.
Cleaning the Fan Blades
Dust accumulation on fan blades reduces efficiency and can cause imbalance. To clean the fan blades, first turn off the fan and allow it to stop completely. Use a soft, lint-free cloth dampened with a mild detergent solution. Gently wipe each blade, both top and bottom, to remove dust and grime. Avoid abrasive cleaners or harsh chemicals, as these can damage the blade finish. For stubborn dirt, slightly dampen the cloth and apply gentle pressure. Dry the blades thoroughly before operating the fan again, ensuring optimal airflow.
Tightening Screws and Connections
Regularly inspect and tighten all screws and connections to maintain the fan’s stability and prevent wobbling or noise. Begin by turning off the power supply to the fan. Check the mounting bracket, blade holders, and the motor housing for any loose screws. Gently tighten them using a screwdriver, avoiding over-tightening which could strip the threads. Also, verify the wire connections within the canopy are secure. This preventative maintenance ensures safe and quiet operation, extending the lifespan of your Hunter ceiling fan and preventing potential hazards.
Replacing Parts
When replacing parts on your Hunter ceiling fan, always disconnect the power supply first. Identifying the correct replacement part is crucial; use your fan’s model number for accurate sourcing. Replacement globes, blades, and motors are available through the Hunter Fan website or authorized retailers. Ensure compatibility before purchasing. For globes, note the style and size. When replacing blades, maintain balance by using a matched set. Motor replacements are best handled by qualified professionals, as they involve electrical work and require specific expertise for safe and proper installation.
Finding Replacement Globes
Locating replacement globes for your Hunter ceiling fan begins with identifying your fan’s specific model number. This ensures compatibility in both size and style. Check the original packaging or the fan housing for this information. Once you have the model number, you can search the Hunter Fan website or contact customer support. Authorized retailers also carry replacement parts. Note the globe’s shape, finish, and mounting type (e.g., screw-on, twist-lock) when ordering. Accurate details will guarantee a perfect fit and restore your fan’s appearance.
Sourcing Replacement Blades
Replacing damaged or outdated fan blades requires identifying your Hunter fan’s model number for compatibility. Begin by checking the Hunter Fan website, which offers a wide selection of replacement blades categorized by model. Alternatively, authorized Hunter retailers can assist in finding the correct blades. When selecting replacements, consider blade pitch, material (wood, composite), and finish to maintain balance and aesthetic consistency. Ensure the new blades match the original specifications to avoid performance issues like wobbling. Proper blade installation is crucial for safe and efficient operation.

Locating Replacement Motors
Finding a replacement motor for your Hunter ceiling fan often requires direct assistance from Hunter’s customer support or authorized service centers, as motors are model-specific. Begin by having your fan’s complete model number readily available. Due to the complexity of fan motors and electrical components, self-replacement is generally not recommended unless you possess significant electrical expertise. Contacting Hunter directly ensures you receive the correct motor and potentially access to qualified technicians for installation. Improper motor installation can lead to safety hazards and void your warranty.
Understanding Fan Features
Hunter ceiling fans boast several features enhancing comfort and convenience. The reversible motor allows for year-round use; in summer, it creates a cooling downdraft, while in winter, it gently redistributes warm air trapped near the ceiling. Many models include integrated light kits, offering adjustable brightness and style options. Remote controls provide effortless speed and light adjustments from anywhere in the room. Explore your fan’s specific capabilities, as features vary by model. Understanding these features maximizes your fan’s efficiency and enjoyment, providing optimal climate control.
Reversible Motor Function
Hunter fans feature a reversible motor, offering seasonal benefits. During warmer months, set the blades to rotate counterclockwise, creating a direct breeze for cooling. In cooler months, switch to a clockwise rotation at a lower speed. This gently pushes warm air, which rises to the ceiling, back down into the living space, improving heating efficiency and comfort. The switch controlling the motor’s direction is typically located on the fan housing. Utilizing this function can significantly reduce energy costs and enhance year-round comfort within your home.
Light Kit Installation and Use
Installing a light kit enhances your Hunter fan’s functionality. Always disconnect power before beginning installation. Carefully follow the wiring diagrams provided with your specific model, ensuring secure connections. Use only bulbs with the wattage specified on the fan’s label to prevent overheating or damage. Once installed, the light kit operates independently of the fan’s motor, controlled by separate pull chains or remote functions. Regularly check the bulb for proper operation and replace as needed, maintaining optimal illumination and extending the lifespan of your light kit.
Warranty Information
Hunter fans are backed by a limited lifetime warranty on the motor and a varying warranty period for other components, typically one year from the date of purchase. This warranty covers defects in materials and workmanship under normal use. To make a claim, retain your original purchase receipt as proof of date. Registering your fan online streamlines the warranty process. The warranty does not cover damage from misuse, accidents, or unauthorized repairs. Contact Hunter’s customer support for detailed warranty terms and claim procedures.
Hunter Fan Warranty Details

Hunter’s limited lifetime motor warranty safeguards against motor defects, while other components enjoy a one-year warranty covering manufacturing flaws. This protection extends to normal residential use; commercial applications may have reduced coverage. Damage resulting from improper installation, misuse, or modifications voids the warranty. Proof of purchase is essential for all claims. Online registration expedites the process. Hunter reserves the right to repair or replace defective parts. Shipping costs for warranty service are typically the responsibility of the consumer.
Registering Your Fan
Registering your Hunter ceiling fan online streamlines warranty claims and ensures you receive important product updates and safety notifications. The process typically requires your fan’s model number, date of purchase, and contact information. Registration confirms your ownership and establishes a record with Hunter. It also allows access to exclusive promotions and support resources. Visit the Hunter Fan website to locate the registration form. Keep your purchase receipt readily available, as it may be requested during the registration process for verification purposes.
Frequently Asked Questions (FAQ)
Can I install a Hunter fan myself? While many homeowners are capable, professional installation is recommended, especially if you’re unfamiliar with electrical work. What if I lost my remote control? Replacement remotes can be purchased directly from the Hunter Fan website or authorized retailers, ensuring compatibility with your specific model. Always verify the model number before ordering. Troubleshooting common issues is covered in the manual, but contacting customer support is advised for complex problems. Proper installation and registration are crucial for warranty validity.
Can I install a Hunter fan myself?
Installing a Hunter ceiling fan is achievable for many homeowners possessing basic electrical knowledge and DIY skills. However, if you lack experience with wiring or are uncomfortable working with electricity, professional installation is strongly recommended. Incorrect installation can pose safety hazards and potentially void the product warranty. Always prioritize safety by disconnecting power before beginning any work. Carefully follow the detailed instructions provided in this owner’s manual, and consult local building codes for compliance.
What if I lost my remote control?
Losing your Hunter ceiling fan remote doesn’t necessarily mean losing control! You can typically purchase a replacement remote specifically designed for your fan’s model number. Begin by identifying your fan’s model – it’s crucial for compatibility. Check the Hunter Fan website or contact their customer support for assistance in locating the correct replacement. Some universal remotes may work, but functionality isn’t guaranteed. Remember to properly program the new remote to your fan following the instructions included with the replacement.
Resources and Support
For comprehensive assistance with your Hunter ceiling fan, several resources are readily available. The official Hunter Fan Website (hunterfan.com) offers a wealth of information, including frequently asked questions, downloadable manuals, and troubleshooting guides. Should you require direct assistance, Customer Support Contact Information is prominently displayed on their website. You can reach them via phone or email, prepared with your fan’s model number for efficient service. Online forums and communities dedicated to home improvement can also provide valuable peer-to-peer support and advice.
Hunter Fan Website
The Hunter Fan website, accessible at hunterfan.com, serves as a central hub for all owner-related needs. Here, you’ll discover a comprehensive library of downloadable owners manuals, categorized by fan model, facilitating easy access to specific instructions. The site also features an extensive FAQ section addressing common concerns and troubleshooting steps. Furthermore, it provides access to replacement parts, warranty registration, and direct links to contact customer support. Regularly updated with helpful articles and videos, the website empowers owners to maximize their fan’s performance.
Customer Support Contact Information
For direct assistance with your Hunter ceiling fan, their customer support team is readily available. You can reach them via phone at 1-888-830-1326, during standard business hours. Alternatively, utilize the online contact form found on the Hunter Fan website (hunterfan.com) for submitting inquiries. Detailed support articles and troubleshooting guides are also accessible online. When contacting support, having your fan’s model number readily available will expedite the process. Expect knowledgeable representatives prepared to address installation, operation, or warranty-related questions efficiently.