Crystal growing kits provide an engaging, hands-on science experience, offering materials and guidance to cultivate vibrant crystals. Perfect for both children and adults, these kits make science fun and educational, allowing you to explore the fascinating process of crystallization while creating stunning geological formations.
What Are Crystal Growing Kits?
Crystal growing kits are educational tools designed for hands-on science experiments, providing materials to grow crystals at home. They typically include chemicals, seed crystals, and instructions. Suitable for children over 8 with adult supervision, these kits teach crystallization principles and geological formations. Many kits offer comprehensive guides covering safety, solution preparation, and troubleshooting; They allow users to observe crystal structures and colors, making science engaging and visually rewarding.
Why Crystal Growing is a Great Science Project
Crystal growing is an excellent science project for engaging students in chemistry and geology. It teaches fundamental concepts like solubility, saturation, and crystallization. Kits are user-friendly, offering step-by-step instructions that make complex science accessible. Growing crystals fosters patience, observation skills, and curiosity, while the visual results provide a rewarding experience. It’s ideal for sparking interest in STEM fields and promoting hands-on learning in a fun and creative way.
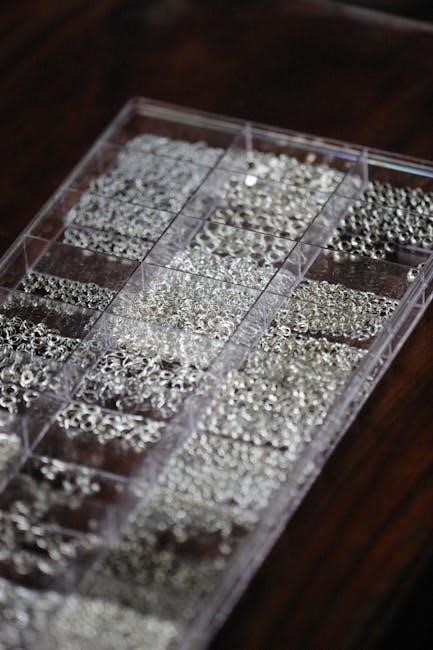
Crystal growing kits typically include crystal-growing powder, seed rocks, a growing container, instructions, and optional materials like food coloring or gloves for enhanced experiments.
Crystal growing kits include essential components like crystal-growing powder, seed rocks, a growing container, and detailed instructions. Optional materials such as food coloring, gloves, and magnifying glasses may also be provided to enhance the experiment. These components work together to facilitate the crystallization process, ensuring a successful and educational experience for users of all ages.
Optional Materials for Enhanced Experiments
Optional materials like food coloring, gloves, and magnifying glasses can enhance your crystal-growing experience. Food coloring adds vibrant hues to your crystals, while gloves ensure safe handling of chemicals. Magnifying glasses allow for a closer look at crystal structures, making the process more engaging and educational for users of all ages.
Safety Precautions and Guidelines

Materials Included in the Crystal Growing Kit
Components and Their Uses
The kit includes crystal-growing dishes, papers, and chemicals like Potassium Ferricyanide and Cupric Sulfate. These components are essential for creating the solution and supporting crystal formation.
General Safety Rules
Always follow the provided instructions and safety guidelines. Ensure adult supervision for children. Keep the experimental area away from young children and pets. Wear protective eyewear and avoid ingesting any chemicals. Store materials safely and dispose of waste properly. Maintain a well-ventilated workspace and avoid eating or drinking nearby. Handle equipment carefully to prevent accidents and ensure a safe, enjoyable experience for all participants.
Handling Chemicals Safely
When handling chemicals, wear protective gloves and eyewear to prevent exposure. Ensure the area is well-ventilated to avoid inhaling fumes. Use the recommended amounts of each substance and avoid mixing chemicals not specified in the instructions. In case of skin contact, rinse thoroughly with water. If accidentally ingested, seek medical advice immediately. Always store chemicals securely, out of reach of children and pets, and follow all safety precautions provided with the kit.

Preparing the Crystal Growing Solution
Mix the crystal-growing chemical with boiling water in the provided container, following kit instructions for precise measurements. Allow the solution to cool before proceeding to ensure proper saturation and crystal formation.
Step-by-Step Solution Preparation
Dissolve the crystal-growing chemical in boiling water, following the kit’s instructions for precise measurements. Stir until fully dissolved, then let the solution cool slightly. Carefully pour the solution into the growing container, ensuring no spills. Cover the container loosely to control evaporation and prevent dust contamination. Allow the solution to reach room temperature before adding the seed crystal. Adult supervision is recommended to ensure safety and accuracy during this process.
Importance of Saturation and Temperature
A saturated solution is essential for crystal growth, as it ensures maximum solute concentration, enabling proper crystallization. Temperature control is equally critical; a stable environment prevents rapid evaporation, allowing crystals to form slowly and evenly. Excessive heat or cold can disrupt the process, leading to poorly formed crystals. Maintaining the optimal temperature specified in your kit instructions ensures larger, more well-defined crystals over time.
Selecting and Preparing the Seed Crystal
Selecting a suitable seed crystal is crucial for successful growth. Choose a clean, dry rock from the kit or a smooth, non-porous surface. Rinse it with water to remove impurities, then dry thoroughly before use. A prepared seed crystal provides a stable surface for crystal formation, ensuring proper growth and structure.
Choosing the Right Seed Crystal
Selecting the right seed crystal is essential for successful growth. Use the rocks provided in the kit or opt for a smooth, non-porous material. Ensure the seed is clean and dry to promote proper crystal formation; Avoid porous surfaces, as they may hinder growth. The seed crystal should be placed securely to allow even growth and prevent obstruction. Proper selection and preparation are key to achieving optimal results.
How to Prepare the Seed Crystal
Preparing the seed crystal involves cleaning and drying it thoroughly to ensure proper crystal formation. Use the materials provided in the kit to avoid contamination. Gently place or suspend the seed in the solution, ensuring it doesn’t touch the container’s sides or bottom. A clean, dry seed promotes optimal crystal growth and prevents unwanted crystal formations. Follow the kit instructions for specific preparation steps.

Placing the Seed Crystal in the Solution
Gently place or suspend the seed crystal in the solution, ensuring it doesn’t touch the container’s sides or bottom. Covering the container for the first 24 hours can aid growth.
Techniques for Optimal Placement
Place the seed crystal gently into the solution, ensuring it does not touch the container’s sides or bottom. Suspend it using a string or clip for even growth. Covering the container for the first 24 hours can enhance crystal formation by reducing evaporation and promoting stabilization. Maintain the setup in a stable, undisturbed environment to allow proper nucleation and growth.
Minimizing Disturbances
Avoid moving or touching the container once the seed crystal is placed, as vibrations can disrupt crystal formation. Store the setup in a stable, dark location away from direct sunlight, heat sources, or drafts. Covering the container loosely can control evaporation while preventing dust from settling. Ensure consistent temperature and humidity levels to promote undisturbed growth and achieve well-formed crystals over time.

Monitoring the Crystal Growth Process
Regularly observe crystal growth, using a magnifying glass for details. Maintain stable temperature and humidity, documenting progress with notes and photos for a detailed record.
Caring for the Growing Environment
Maintain a stable, undisturbed environment for optimal crystal growth. Avoid direct sunlight, vibrations, and extreme temperatures. Cover the container to control evaporation and prevent dust contamination. Ensure consistent humidity and temperature, as fluctuations can disrupt the crystallization process. Regularly inspect the setup to ensure conditions remain ideal, fostering uninterrupted growth and well-formed crystals over time.
Timeframes and Expectations
Crystal growth varies in time, from a few days to several weeks, depending on the crystal type and solution conditions. Observe daily for changes, noting how crystals develop. Early signs include small formations, with growth becoming more visible over weeks. Be patient, as slower growth often yields larger, more defined crystals; Expect unique shapes and clarity, reflecting the solution’s saturation and environment stability.
Documenting Your Crystal Growth Journey
Documenting your crystal growth journey helps track progress and provides insights. Keep a detailed journal, note observations, and take photos to capture each stage of development.
Keeping a Growth Journal
Keeping a growth journal helps you track the progress of your crystal growth experiment. Record the start and end dates, observations, and any changes in crystal size or shape. Note the type of seed crystal used, the chemicals applied, and the environmental conditions. Documenting these details provides valuable insights and helps identify patterns or issues. Regular entries also make the process more engaging and educational, allowing you to reflect on your experiment’s journey and results.
Photographing and Sketching Progress
Photographing and sketching your crystal’s growth stages provides a visual record of its development. Capture images regularly to document changes in size, shape, and clarity. Sketches can highlight intricate details and color variations. Use a magnifying glass to observe finer structures and include these observations in your documentation.
These visual records help track progress, identify patterns, and understand the crystallization process. They also serve as a creative way to share your scientific journey and achievements with others, making the experiment more engaging and rewarding.
Troubleshooting Common Issues
- If crystals aren’t forming, check saturation levels and ensure the solution is properly prepared.
- Minimize disturbances to avoid disrupting the delicate crystal growth process.
- Adjust environmental conditions, like temperature and humidity, to optimize growth.
Identifying and Solving Problems
- If crystals aren’t forming, ensure the solution is properly saturated and free from impurities.
- Cloudy solutions may indicate improper mixing; restart with fresh materials.
- Slow growth? Maintain consistent temperature and avoid disturbances.
- For misshapen crystals, adjust evaporation rates by covering the container.
- Impurities can disrupt growth; filter the solution if necessary.
Adjusting Conditions for Better Results
- Adjust the temperature to optimize growth rates; slower cooling often yields larger crystals.
- Control evaporation by loosely covering the container to maintain humidity and prevent rapid drying.
- Ensure the solution is clear and free of impurities for optimal crystal formation.
- Avoid vibrations and direct sunlight to maintain a stable environment.
- Monitor and adjust saturation levels to promote uniform crystal growth.
Understanding the Science Behind Crystal Growth
Crystal growth begins with a saturated solution. As it cools or evaporates, supersaturation occurs, causing atoms to form a crystal lattice around a seed. Slower growth yields larger, well-defined crystals.
The Chemistry of Crystallization
Crystallization occurs when a saturated solution cools or evaporates, causing the solute to exceed its solubility limit. This supersaturation triggers nucleation, where atoms or molecules arrange into a crystal lattice. The seed crystal provides a surface for this process, enabling ordered growth. Factors like temperature, concentration, and solvent type influence the crystal’s shape and size, demonstrating the intricate interplay of chemistry and physics in crystal formation.
Different Crystal Structures and Formations
Crystals form unique structures based on their atomic or molecular bonding. Ionic compounds often create geometric shapes like cubes, while molecular compounds may form more complex patterns. The arrangement of atoms in the crystal lattice determines properties like shape, hardness, and optical characteristics. Environmental factors such as temperature and solvent type can influence the final structure, leading to diverse crystal formations and sizes, each with distinct visual and physical traits.
With patience and practice, crystal growing becomes a rewarding hobby. Explore more complex kits, experiment with new substances, and delve deeper into crystal chemistry for endless learning and creativity.
Reflecting on Your Experiment
Reflecting on your crystal-growing experiment offers valuable insights into the scientific process. Observing the crystal’s formation fosters curiosity and understanding of chemical reactions. Documenting your journey helps track progress and identify areas for improvement. Celebrate your achievements, whether a perfectly formed crystal or unexpected results, as each outcome teaches something new. This hands-on experience sparks creativity and encourages further exploration of chemistry and geology.
Encouragement to Explore Further
Growing your first crystal is just the beginning! Encourage curiosity by exploring different crystal types, colors, and shapes. Experiment with varying solutions, temperatures, and techniques to discover unique formations. This hands-on learning fosters patience and scientific thinking. Share your results, inspire others, and dive deeper into the fascinating world of chemistry and geology. Keep experimenting and enjoy the endless possibilities of crystal growth!