Understanding bathroom plumbing rough-in dimensions is crucial for a successful installation. This guide provides essential measurements for sinks, toilets, showers, and bathtubs, ensuring accurate placement and functionality.
What is Bathroom Plumbing Rough-In?
Bathroom plumbing rough-in refers to the initial stage of installing plumbing systems, where pipes, drains, and fixtures are planned and laid out. This phase involves marking and positioning water supply lines, drainpipes, and ventilation systems according to standard measurements and local building codes. Proper rough-in ensures that fixtures like sinks, toilets, showers, and bathtubs align correctly with plumbing connections, preventing future issues. It is a critical step in bathroom construction or renovation, as accurate placement and sizing of pipes and drains are essential for functionality and compliance with regulations. This stage sets the foundation for the final installation of fixtures and ensures a smooth, trouble-free plumbing system.
Importance of Accurate Dimensions in Bathroom Plumbing
Accurate dimensions in bathroom plumbing rough-in are essential for ensuring proper installation and functionality. Incorrect measurements can lead to installation issues, such as misaligned fixtures, leaks, and increased repair costs. Precise dimensions guarantee that water supply lines, drainpipes, and vents are correctly positioned, preventing future plumbing problems. Additionally, accurate measurements ensure compliance with local building codes and safety standards. Properly sized pipes and drains also improve water flow efficiency and reduce the risk of clogs. By adhering to standard rough-in dimensions, you ensure a smooth, trouble-free plumbing system that meets both functional and regulatory requirements. This attention to detail is critical for a successful bathroom plumbing installation.
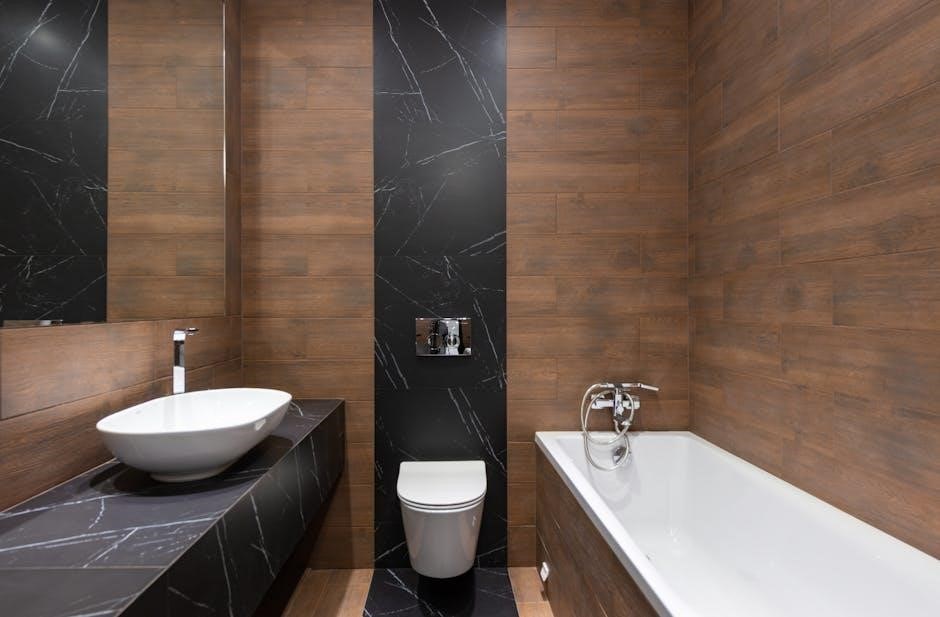
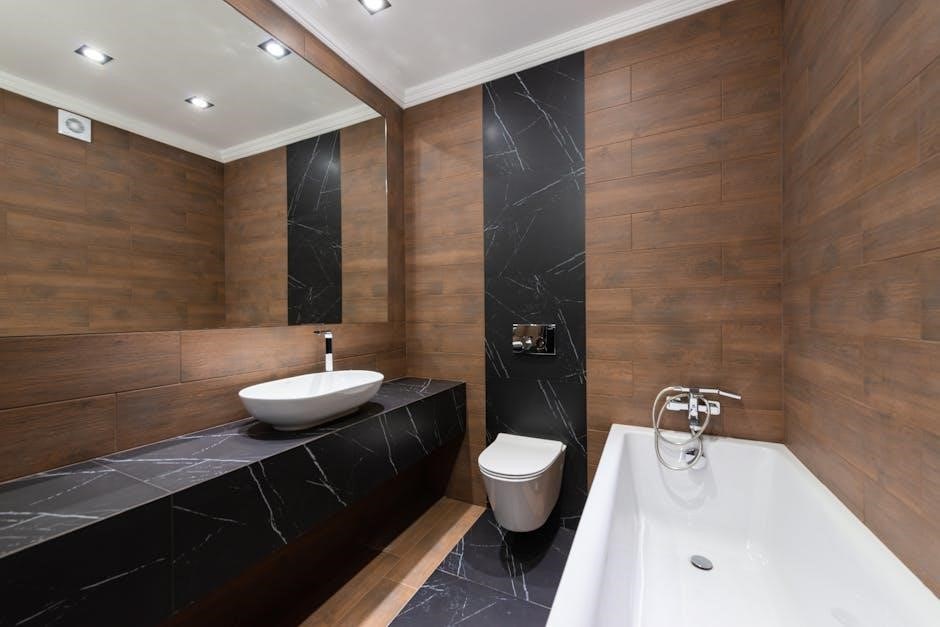
Bathroom Sink Rough-In Dimensions
The bathroom sink rough-in typically places the drain centerline 18-20 inches above the floor and 4-6 inches from the wall. Supply lines are usually 8 1/4 inches above the floor, ensuring proper water flow and alignment for fixtures.
Standard Height for Sink Drain
The standard height for a bathroom sink drain is typically between 18 and 20 inches above the finished floor. This measurement ensures the drain aligns properly with the P-trap and maintains optimal drainage flow. Accurate placement prevents issues like poor water flow or gurgling sounds. The drain centerline should be centered under the sink to ensure symmetry and ease of installation. Proper height also considers the sink’s mounting style, such as wall-mounted or countertop, to maintain functionality and aesthetics. Double-checking these measurements ensures compatibility with standard plumbing fixtures and avoids costly rework during installation.
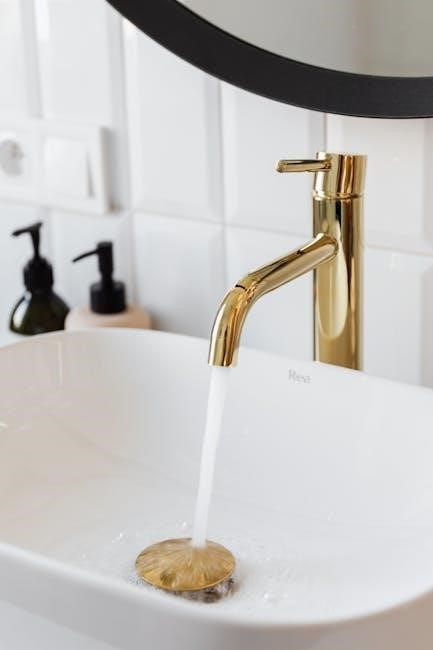
Supply Line Placement and Measurements
Proper placement of water supply lines is essential for efficient bathroom plumbing; The hot and cold water supply lines are typically spaced 8 inches apart horizontally, measured from the center of each line. Vertically, these lines are usually positioned 2 to 3 inches above the drain pipe to ensure proper water flow and avoid interference. The centerlines for the supply lines should align with the faucet mounting holes, ensuring a secure and leak-free connection. Accurate measurements prevent future issues like poor water pressure or leakage. Always refer to local building codes and manufacturer specifications for precise placement, as deviations can lead to installation problems. Proper alignment and spacing ensure functionality and safety in bathroom plumbing systems.
Typical Faucet Rough-In Dimensions
The standard faucet rough-in height is typically between 20 and 22 inches above the finished floor, ensuring convenient access and proper water flow. The center of the faucet mounting holes should align with the sink drain, which is usually located 18 inches above the floor. Supply lines for hot and cold water are spaced 8 inches apart horizontally, with each line positioned 4 inches to the left and right of the drain centerline. These measurements ensure compatibility with most sink and countertop configurations. However, exact dimensions may vary depending on the faucet type and manufacturer. Always consult the specific faucet’s installation guide for precise measurements to avoid installation errors and ensure a secure, leak-free connection.
Toilet Rough-In Dimensions
The standard toilet rough-in distance is 12 inches from the wall to the drain centerline, ensuring proper toilet installation and alignment with flooring and fixtures.
Standard Toilet Drain Rough-In Distance
The standard toilet drain rough-in distance is typically 12 inches from the wall to the centerline of the drain. This measurement ensures proper toilet installation and alignment with the floor. Accurate rough-in dimensions prevent future issues like poor drainage or leaks. The 12-inch distance is compatible with most standard toilets and fixtures, making it a reliable benchmark for plumbers and contractors. Proper alignment also simplifies the installation process, reducing the risk of costly corrections later. Always consult local building codes to confirm compliance, as minor variations may exist. Precise measurements are essential for a functional and long-lasting bathroom plumbing system.
Supply Line Heights for Toilets
The standard height for toilet supply lines is typically 8.25 inches above the finished floor. This measurement ensures the water supply lines align correctly with the toilet’s inlet valve. The vertical supply line should be positioned 2 to 3 inches above the drain pipe, while the horizontal supply line is usually 4 inches from the centerline of the drain. Proper alignment prevents leaks and ensures smooth operation. Local building codes may vary slightly, so it’s essential to verify specifications. Accurate supply line placement is critical for a functional and leak-free toilet installation. Always double-check measurements to avoid costly adjustments later. Proper installation ensures reliability and longevity of the plumbing system.
Toilet Flange and Drain Pipe Measurements
The toilet flange is typically installed 0.25 inches above the finished floor, ensuring a secure seal with the toilet. The drain pipe for a toilet is usually 3 inches in diameter, allowing for proper waste flow. The flange is secured to the floor using screws or anchors, and its center aligns with the toilet drain hole. Proper measurement and alignment of the flange and drain pipe are critical to prevent leaks and ensure a stable toilet installation. Always verify local building codes, as minor variations may apply. Accurate measurements ensure a watertight seal and long-term functionality of the toilet system.
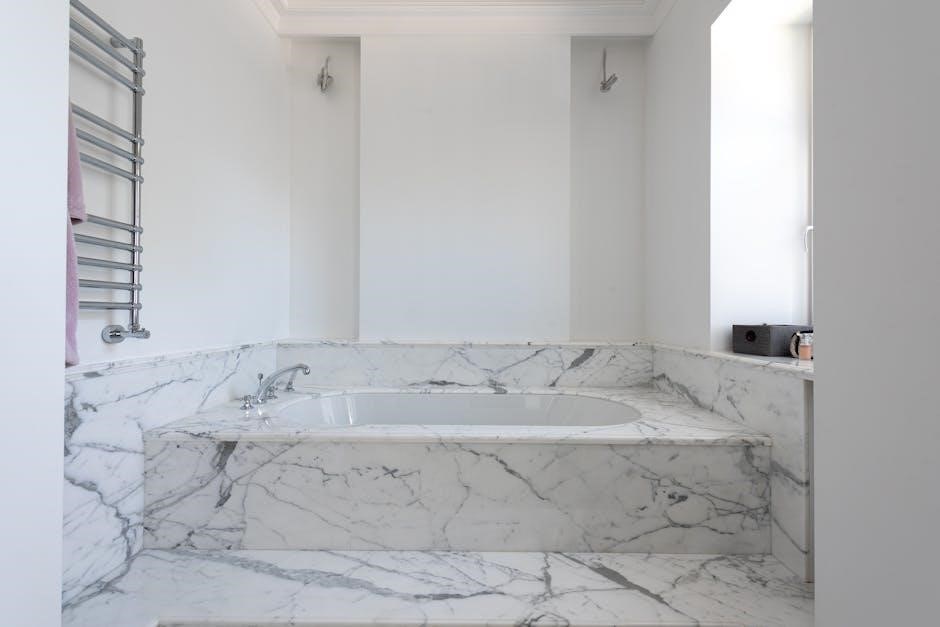
Shower and Bathtub Rough-In Dimensions
Shower drains are typically placed 2-3 inches below the finished floor, while bathtub drains are usually positioned 12-18 inches from the floor. Accurate measurements ensure proper water flow and fixture alignment, preventing installation issues and ensuring functionality.
Shower Drain Placement and Depth
The shower drain is typically placed 2-3 inches below the finished floor to ensure proper water flow and drainage. The center of the drain should be aligned with the shower floor’s lowest point, usually 30-36 inches from the wall to meet standard building codes. The depth and placement are critical to prevent water pooling and ensure efficient drainage. The trap and vent pipe should also be installed correctly to maintain proper plumbing function and prevent sewer gases from entering the bathroom. The drain line size is typically 2 inches to accommodate shower water flow. Accurate measurements are essential to comply with local building codes and ensure a functional installation.
Standard Bathtub Drain Rough-In Dimensions
Standard bathtub drain rough-in dimensions typically include a drain placement 12 inches from the wall to the centerline of the drain. The bathtub is usually 30 inches wide and 60 inches long, with the drain located at the bottom center. The P-trap should be installed 18 inches above the floor, and the drainpipe size is typically 1.5 inches. The vent pipe size is usually 2 inches to ensure proper ventilation. The faucet rough-in height is generally 22 inches above the floor, with the faucet centered 4 inches from the wall. These measurements ensure proper water flow, drainage, and compliance with standard plumbing codes for a functional and efficient bathtub installation.
Faucet and Showerhead Placement Measurements
Faucet and showerhead placement is critical for functionality and user comfort. The standard faucet rough-in height is approximately 22 inches above the floor, centered 4 inches from the wall. Showerheads are typically placed between 72 and 80 inches above the floor for optimal height. The showerhead should be centered directly above the drain, ensuring proper water flow and minimal splashing. Faucet handles are usually spaced 8 inches apart for dual-handle models. For shower systems, the showerhead and faucet should align vertically for a balanced look. These measurements ensure ergonomic design and compliance with standard plumbing practices, providing a comfortable and functional showering experience while meeting local building codes and regulations.
Water Supply Line Dimensions
Water supply lines typically range from 20 to 22 inches above the floor for vertical placement. Horizontal lines are spaced 4 inches from the wall, ensuring proper alignment and accessibility for bathroom fixtures.
Hot and Cold Water Line Spacing
Hot and cold water supply lines are typically spaced 8 inches apart horizontally, measured from the centerline of the drain. The cold water line is usually positioned 4 inches to the left of the drain’s center, while the hot water line is 4 inches to the right. This standard spacing ensures proper installation and alignment with fixtures like faucets and valves. Vertical placement for these lines is generally 20 to 22 inches above the finished floor, providing easy access for plumbing connections. Accurate spacing prevents interference and ensures compliance with plumbing codes. Proper measurement and alignment are critical for functionality and aesthetics in bathroom plumbing systems.
Vertical and Horizontal Supply Line Measurements
Vertical supply lines for bathroom plumbing are typically installed 20 to 22 inches above the finished floor, ensuring easy access and proper alignment with fixtures. Horizontally, hot and cold water lines are spaced 8 inches apart, measured from the centerline of the drain. The cold water line is usually positioned 4 inches to the left, while the hot water line is 4 inches to the right. These measurements ensure compatibility with standard faucet configurations and prevent interference. Proper alignment and spacing are critical for functionality and compliance with plumbing codes. Accurate vertical and horizontal placement guarantees efficient water delivery and minimizes potential issues during installation or future maintenance.
Drainage System Dimensions
Accurate measurements are vital for proper drainage. Trap pipes are typically 12-18 inches deep, while vent pipes extend above the roof. Drain slopes ensure proper flow and prevent clogs.
Trap and Vent Pipe Measurements
Trap and vent pipe measurements are critical for proper drainage and ventilation. Trap pipes, typically 12-18 inches deep, prevent sewer gases from entering the bathroom. Vent pipes, extending above the roof, ensure atmospheric pressure balance. The trap’s slope must be precise to avoid clogs. Vent pipe diameters usually range from 1.5 to 4 inches, depending on the system. Proper sizing ensures efficient drainage and prevents siphoning. These measurements align with plumbing codes, guaranteeing functionality and safety. Accurate installation is essential for maintaining system efficiency and avoiding future issues. Always consult local codes for specific requirements.

Branch Drain and Building Drain Sizes
Branch drain and building drain sizes are essential for proper wastewater flow. Branch drains, connecting individual fixtures to the main system, typically range from 1.5 to 2 inches in diameter for small bathrooms. Larger bathrooms may require up to 3 inches. The building drain, carrying wastewater from the branch drains to the sewer, usually measures 3 to 4 inches in diameter. Proper sizing ensures efficient drainage and prevents backups. Local building codes often dictate specific dimensions based on the number of fixtures and water flow rates. Incorrect sizing can lead to poor drainage and potential system failures. Always consult local regulations to ensure compliance and optimal performance. Properly sized drains are crucial for a functional and long-lasting plumbing system.
Bathroom Plumbing Rough-In Diagrams
Bathroom plumbing rough-in diagrams provide a visual guide for installing pipes, drains, and fixtures. They include key measurements and layouts to ensure accurate and compliant installations.
Understanding Plumbing Diagrams for Bathrooms
Plumbing diagrams are detailed visual guides that outline the layout and connections for bathroom fixtures, pipes, and drainage systems. They include measurements, fixture placements, and pipe routes, ensuring installations meet building codes. These diagrams are essential for planning and executing bathroom plumbing projects accurately. They help identify the correct positions for sinks, toilets, showers, and bathtubs, as well as water supply and drainage lines. By following these diagrams, installers can avoid costly errors and ensure all components function properly. Diagrams also highlight clearance requirements and ventilation systems, making the installation process more efficient and compliant with local regulations. They are a critical tool for both professionals and DIY enthusiasts to achieve a successful bathroom plumbing rough-in.
Key Components in Rough-In Diagrams
Rough-in diagrams for bathroom plumbing include essential components like water supply lines, drainpipes, and fixture connections. These diagrams detail the placement and measurements of sinks, toilets, showers, and bathtubs, ensuring proper alignment with pipes. They also illustrate the location of shut-off valves, trap systems, and vent pipes, which are critical for drainage and ventilation. Fixture connections, such as faucet mounting heights and drain centers, are precisely marked to simplify installation. Additionally, diagrams highlight clearance requirements for fixtures and pipes, ensuring compliance with building codes. These visual guides provide a comprehensive roadmap for installers, helping them avoid errors and ensure all systems function efficiently. Accurate representation of these components is vital for a successful bathroom plumbing rough-in.
Additional Considerations
Ensure compliance with local building codes, consider future maintenance access, and verify adequate spatial clearances for fixtures to meet safety and functionality standards.
Clearance Requirements for Fixtures
Proper clearance around bathroom fixtures is essential for comfort, safety, and compliance with local building codes. The minimum clearance for toilets is typically 15 inches from the centerline to walls or obstructions, while sinks require at least 12 inches of clearance in front and 3 inches from adjacent surfaces. Showers and bathtubs need a minimum of 12 inches of clearance from walls and 24 inches of unobstructed space in front. Ensure doors swing outward and provide at least 60 inches of turning radius for accessibility. These clearances prevent overcrowding and ensure easy access for maintenance and future upgrades, aligning with universal design principles for functionality and safety.
Local Building Codes and Regulations
Local building codes and regulations dictate specific requirements for bathroom plumbing rough-in dimensions to ensure safety, functionality, and compliance. These codes vary by jurisdiction but often reference standards like the Uniform Plumbing Code (UPC) or International Plumbing Code (IPC). Key requirements include minimum shower areas, drain sizes, and vent pipe diameters. For example, the UPC specifies a minimum shower area of 900 square inches with a 30-inch diameter, while vent pipes must be sized to prevent siphonage. Authorities may also mandate inspections before plumbing is concealed. Failure to adhere to these regulations can result in failed inspections or unsafe conditions. Always consult local building authorities to confirm specific requirements for your project.
Common Mistakes in Bathroom Plumbing Rough-In
Common mistakes in bathroom plumbing rough-in include incorrect measurements for fixture placement, such as miscalculating drain heights or supply line positions. Ignoring local building codes and regulations is another frequent error, leading to non-compliance issues. Improper alignment of vent pipes and drains can cause functionality problems. Additionally, failing to account for future fixture upgrades or accessibility needs can result in costly rework. To avoid these mistakes, double-check all measurements, consult local codes, and ensure proper alignment of pipes and vents. Using detailed diagrams and seeking professional advice can also help prevent errors and ensure a smooth installation process.
Accurate bathroom plumbing rough-in dimensions are crucial for proper fixture installation and functionality. Ensure compliance with local codes and double-check measurements to prevent future issues.
The standard bathroom plumbing rough-in dimensions ensure proper fixture installation and functionality. For toilets, the drain center is typically 12 inches from the wall, while the supply line is 8 1/4 inches above the floor. Sinks require the drain center to be 18-20 inches above the floor, with supply lines 4 inches apart horizontally. Showers and bathtubs have drains placed 18-24 inches above the floor, depending on design. Accurate measurements prevent installation issues and ensure compatibility with fixtures. These dimensions align with local building codes and manufacturers’ specifications, guaranteeing a smooth and functional plumbing system. Proper planning and adherence to these standards are essential for a successful bathroom plumbing project.
Final Tips for Successful Bathroom Plumbing Installation
For a seamless bathroom plumbing installation, ensure all rough-in dimensions align with local building codes and fixture specifications. Double-check measurements for drains, supply lines, and vents to avoid costly rework. Use high-quality materials and follow manufacturer guidelines for optimal performance. Properly seal all connections to prevent leaks, and test the system before finishing the walls or floors. Consider consulting a professional if unsure about complex installations. Accurate planning and attention to detail will result in a functional and long-lasting plumbing system. Remember, precise measurements and adherence to standards are key to a successful project.