
Welcome to the ReliOn Glucose Meter Manual, your guide to understanding and using the ReliOn Blood Glucose Monitoring System effectively. This manual provides essential information for proper setup, usage, and maintenance of the meter, ensuring accurate glucose monitoring and optimal diabetes management. Designed for simplicity and accuracy, the ReliOn Glucose Meter is a reliable tool for daily blood glucose testing. Please read this manual carefully before using the device to ensure safe and effective operation.
Overview of the ReliOn Glucose Meter
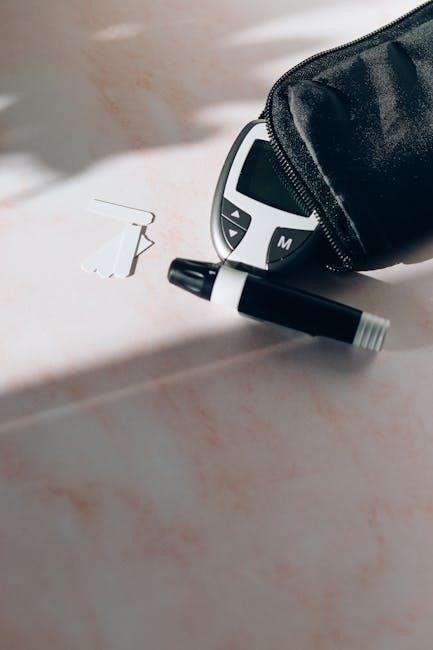
The ReliOn Glucose Meter is a portable, user-friendly device designed for accurate blood glucose monitoring; It is part of the ReliOn Blood Glucose Monitoring System, which includes the meter, test strips, and a lancing device. The meter is intended for single-patient use, ensuring hygiene and preventing cross-contamination. It measures glucose levels in fresh capillary whole blood samples, typically obtained from the fingertip. The device is compact and lightweight, making it easy to carry for daily glucose testing. The ReliOn Glucose Meter is designed to provide quick and reliable results, aiding in effective diabetes management. Always use the meter with compatible ReliOn test strips for optimal performance. Regular cleaning and proper handling are essential to maintain accuracy and longevity. Follow the manual instructions for correct usage and care. This device is an essential tool for individuals needing to monitor their blood glucose levels regularly.

Importance of Reading the Manual
Reading the ReliOn Glucose Meter manual is crucial for safe and effective use of the device. The manual provides essential information, including setup instructions, testing procedures, and maintenance tips. It ensures users understand how to operate the meter correctly, interpret results accurately, and troubleshoot common issues. Proper understanding of the manual prevents errors in glucose testing, which is vital for diabetes management. The manual also includes guidelines for cleaning, disinfecting, and storing the device, ensuring longevity and accuracy. By following the manual, users can optimize the meter’s performance and rely on precise results for better health outcomes. Always refer to the manual before performing any test or adjustment to ensure compliance with recommended procedures and safety standards.

Setting Up the ReliOn Glucose Meter
Setting up the ReliOn Glucose Meter is essential for accurate blood glucose monitoring. Begin by setting the correct time and date in your preferred format. Adjust the audible beep volume to a comfortable level. Ensure test averaging is enabled for tracking glucose trends; Complete these steps before performing any blood glucose test to ensure precise and reliable results. Proper setup guarantees accurate monitoring, crucial for effective diabetes management.
Initial Setup Requirements
Before using the ReliOn Glucose Meter, ensure all initial setup requirements are met for accurate and reliable performance. First, set the time and date in either 12-hour or 24-hour format and choose between month/day or day/month date display. Adjust the audible beep volume to your preference for test confirmation. Ensure the meter is turned on and ready for use. Use only ReliOn test strips compatible with your meter for precise glucose measurement. Do not reuse test strips, as this may lead to inaccurate results. Proper setup ensures the meter functions correctly and provides reliable blood glucose readings. Always refer to the user manual for specific button functions and additional guidance.
Setting Time and Date

To ensure accurate blood glucose tracking, set the time and date on your ReliOn Glucose Meter before first use. The meter offers a choice between 12-hour (with AM/PM) and 24-hour formats. Select your preferred time format using the navigation buttons. For the date, choose either month/day or day/month format. Once set, the meter will automatically display the correct time and date for each test result. Accurate time and date settings are essential for maintaining a proper record of your blood glucose readings. After confirming your settings, the meter will save the information and be ready for use. This step is crucial for ensuring your test results are time-stamped correctly and stored in the meter’s memory for future reference.
Adjusting Audible Beep Volume
To customize your ReliOn Glucose Meter experience, you can adjust the audible beep volume or turn it off. Access the setup menu by pressing and holding the “M” button until “SETUP” appears on the screen. Use the navigation buttons to scroll to the “Beep” option and select it. Choose from multiple volume levels, including a mute option if you prefer silent operation. The meter will confirm your selection with a beep (unless muted). Adjusting the beep volume ensures that the device meets your personal preferences and environmental needs. This feature is particularly useful for individuals who prefer discreet testing or those with hearing impairments. Once set, the volume setting will remain until you decide to change it again.
Performing a Blood Glucose Test

Performing a blood glucose test with the ReliOn Meter involves turning it on, inserting a test strip, obtaining a blood sample, applying it to the strip, and waiting for the reading. Always follow the manual for accurate results.

Preparation for Testing
Before performing a blood glucose test with your ReliOn Meter, ensure proper preparation for accurate results. Wash your hands thoroughly with soap and warm water, and dry them completely to avoid contamination. Select a ReliOn test strip and ensure it matches your meter model. Insert the test strip into the meter, following the arrows on the strip and meter for correct alignment. Turn on the meter and wait for the “ready” indicator. Choose a clean, dry fingertip for the blood sample, avoiding areas with calluses or scars for better blood flow. Allow the meter to warm up to room temperature for optimal performance. Always use a fresh lancet and test strip for each test to ensure hygiene and accuracy. Proper preparation ensures reliable results and safe testing.
Using Test Strips
ReliOn test strips are specifically designed for use with the ReliOn Glucose Meter and ensure accurate blood glucose readings. To use a test strip, insert it into the meter slot with the test end facing down, aligning the arrows on the strip and meter. The meter will turn on automatically once the strip is correctly inserted. Handle test strips by the sides to avoid touching the test area, which could contaminate the strip and affect results. Always use a new test strip for each test and discard used strips properly. Store test strips in their original container to maintain their quality and shelf life. Ensure the test strip lot number matches the meter’s compatibility for optimal performance. Using the correct test strips is crucial for reliable glucose monitoring.
Applying Blood Sample
To apply a blood sample, first obtain a small blood drop using a lancing device. Gently place the blood onto the test strip’s edge, ensuring it fills the entire sample area. The meter will automatically detect the sample and begin the test. If the blood sample is insufficient, the meter may prompt you to apply more. Avoid touching the test strip’s reactive area with your fingers or reapplying blood once the test has started. Use a new test strip if the initial sample is too small. Properly dispose of used lancets and test strips. Always follow the meter’s instructions for accurate results. This step ensures reliable glucose measurements, helping you manage your diabetes effectively.
Maintenance and Troubleshooting
Regularly clean the meter with a soft cloth and mild soap. Avoid harsh chemicals and water submersion. For troubleshooting, clear memory by turning off the meter and pressing the M button. Address issues like incorrect time settings or test strip errors promptly to ensure accurate readings and maintain device functionality.
Cleaning and Disinfecting the Meter
Regular cleaning and disinfecting of the ReliOn Glucose Meter are essential to maintain its accuracy and prevent contamination. Use a soft, dry cloth to wipe the meter’s exterior, avoiding any harsh chemicals or abrasive materials. Do not submerge the meter in water or expose it to excessive moisture, as this may damage the internal components. For disinfection, lightly dampen a cloth with a mild soap solution and gently wipe the surface. Ensure the meter is dry before use. Follow the manufacturer’s guidelines to prevent damage and ensure proper functioning. Cleaning and disinfecting are crucial for maintaining hygiene and ensuring reliable blood glucose readings. Always refer to the user manual for detailed instructions on compatible cleaning agents and methods.
Clearing Memory
To clear the memory on your ReliOn Glucose Meter, ensure the device is turned off. Locate the “M” button and press and hold it until the memory menu appears on the screen. Use the navigation buttons to scroll to the “Clear Memory” option and confirm your selection. This process will erase all stored blood glucose readings. Note that clearing the memory cannot be undone, so ensure all data has been recorded or downloaded before proceeding. After clearing, the meter will reset, and you can begin recording new readings. Regularly clearing memory helps manage data storage and keeps your testing records organized. Always refer to your user manual for specific instructions tailored to your meter model.
Troubleshooting Common Issues
If your ReliOn Glucose Meter experiences issues, start by ensuring the device is turned on and the battery is not depleted. If the meter does not turn on, replace the battery with a new one. For inaccurate readings, check that the test strips are not expired or damaged and are correctly inserted. Ensure the meter is set to the correct time and date. If an error message appears, refer to the user manual for specific codes and solutions. Clean the meter regularly to prevent contamination. If problems persist, reset the device by turning it off and on again. For unresolved issues, contact customer support or consult the troubleshooting section in your manual for further guidance. Proper maintenance and regular checks can help minimize common issues.